We may earn money or products from the companies mentioned in within the website.

Planning is Paramount: Choosing the Right Wood Shed Plans
So, you’re standing there, staring at your yard, imagining the perfect little shack nestled amongst the trees. But hold your horses, cowboy! Before you start swinging that hammer, you need to have a plan. And I’m not talking about some half-baked idea scribbled on the back of a napkin. Nope, you need a solid blueprint, a roadmap to shed success. A well-defined plan is the cornerstone of a successful shed building project. Here’s what to consider when selecting wood shed plans:
A. Size and Functionality:
You don’t want to end up with a shed that’s too big to fit or so tiny you can barely squeeze in your lawnmower.
- Measure twice, cut once! Accurately measure the available space in your yard, accounting for access points and clearances.
- Assess your needs: Will the shed primarily be for storage, a workshop, or a multi-purpose space? Consider the necessary storage capacity and functionality (e.g., workbenches, shelving).
- Local regulations: Check with your local building department to determine any size restrictions or permit requirements for sheds in your area. Because the last thing you need is the city busting down your door because your shed’s a few inches too tall.
B. Design and Complexity:
- Start simple: As a beginner, opt for a basic rectangular or square design with a simple gable roof. This minimizes complex cuts and intricate framing techniques.
- Consider pre-cut lumber options: Some retailers offer pre-cut lumber kits based on specific plans, simplifying the cutting process for beginners.
- Wood shed plans resources: Numerous online resources offer a plethora of free and paid wood shed plans. Look for plans that provide clear and detailed instructions, along with material lists and visual aids (e.g., diagrams, 3D models).
If you’re specifically looking for comprehensive and easy-to-follow shed plans, you might want to check out Ryan’s Shed Plans. With a wide range of designs and step-by-step instructions, Ryan’s Shed Plans can help you tackle your shed-building project with confidence and ease.
C. Material Selection:
You want this thing to last, go for quality lumber that can stand up to whatever Mother Nature throws its way. A solid base is what you need. You have a couple of options here.
- Foundation: Concrete slabs offer a permanent base but require more expertise and planning. Gravel pads and post foundations are budget-friendly options for smaller sheds on well-drained soil. Refer to your chosen plans for specific foundation recommendations.
- Wood: Pressure-treated lumber is the standard choice for sheds, resisting rot and insect damage. Select appropriate lumber sizes based on your plans (e.g., 2x4s for framing, plywood for walls and roof sheathing). Don’t forget that pre-cut lumber kits are also an option you can decide on.
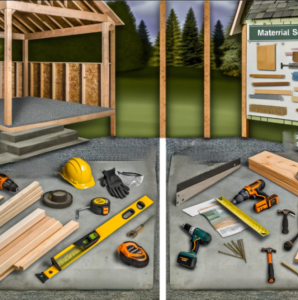
D. Tools of the Trade: Gearing Up for Success

Alright, now that you’ve got your plans and your materials lined up, it’s time to gear up for battle. Remember these words, “safety first”. Let’s assemble your construction toolkit:
- Safety first: Equip yourself with essential safety gear like safety glasses, gloves, dust mask, and sturdy work boots. The whole nine yards.
- Measuring and marking: A tape measure, level, and carpenter’s square will help to make sure your cuts are on point. And speaking of cuts, you’ll need some cutting tools.
- Cutting tools: A circular saw or reciprocating saw for lumber cuts, and a miter saw for precise angled cuts (optional but helpful).
- Fastening tools: A drill with various drill bits, a hammer, and a nail gun can significantly expedite construction.
E. Building Your Wood Shed: Step-by-Step Guide

Now, onto the fun part – building your woodshed. It’s like putting together a giant puzzle, but with power tools. With your plans, materials, and tools prepped, it’s time to break ground on your shed project!
1. Foundation Construction:
- Follow the specific instructions in your wood shed plans for building your chosen foundation type (concrete slab, gravel pad, or post foundation) to get that base laid down solid.
2. Floor Framing:
- Using pressure-treated lumber of the specified sizes, construct the floor frame according to the plan’s layout. Ensure proper leveling and secure the frame to the foundation using appropriate hardware.
3. Wall Framing:
- Construct the wall panels using the plan’s specifications for stud placement, bracing, and top and bottom plates.
- Raise and secure the wall panels to the floor frame, ensuring vertical alignment with the level.
4. Roof Framing:
- Following the plan’s diagrams, assemble the rafters and any necessary trusses for the roof structure.
- Raise the roof assembly and secure it to the top plates of the walls, ensuring proper alignment and squareness.
5. Sheathing and Roofing:
- Attach plywood or OSB sheathing to the exterior walls and roof according to the plan, creating a smooth surface for siding and roofing materials.
- Install the chosen roofing material (e.g., asphalt shingles) as per the manufacturer’s instructions and ensure proper flashing for water drainage.
6. Siding and Trim:
- Apply chosen siding material (e.g., vinyl, wood panels) to the exterior walls, following the plan’s recommendations for installation.
- Add trim boards around windows, doors, roof edges, and corners for a finished look.
7. Doors and Windows
- Doors and Windows: Installation of doors and windows is crucial for functionality and ventilation. Here’s what to consider:
- Door selection: Choose an exterior door appropriate for your shed’s size and intended use. Pre-hung doors (doors with pre-attached frames) simplify installation.
- Window selection: Select windows that complement the shed’s design and provide adequate ventilation. Ensure they are double-glazed for better insulation, especially in extreme climates.
- Installation: Follow the manufacturer’s instructions for installing your chosen doors and windows. Typically, this involves creating rough openings in the wall framing, securing the window/door frame, and finishing the trim around the opening.
8. Finishing Touches
- Painting or staining: Apply a coat of paint or stain to the exterior of your shed for weather protection and a personalized touch. Choose exterior-grade paint or stain suitable for your climate.
- Hardware installation: Install doorknobs, locks, and any additional hardware as per the chosen door and window specifications.
- Organization (optional): Depending on your shed’s purpose, consider adding shelves, tool racks, or pegboards for efficient storage and organization.
Safety Tips for Beginners
Building a shed might sound like a walk in the park, but let me tell you, safety should be your number one priority every step of the way. Here are some tips to keep you from ending up in the emergency room:
- Work with a partner: Having a helping hand can improve safety and efficiency during construction, especially for lifting heavier materials or maneuvering large panels.
- Use the right tools for the job: Don’t force tasks with inadequate tools. Invest in proper safety gear and ensure all tools are in good working condition.
- Plan your cuts carefully: Double-check measurements before making any cuts to avoid wasting materials or compromising structural integrity.
- Mind your surroundings: Be aware of electrical lines, plumbing pipes, or underground utilities when digging for the foundation.
- Take breaks and avoid fatigue: Construction work can be physically demanding. You don’t need to push yourself to the brink of collapse. Listen to your body, take breaks, and stay hydrated.
Celebrating Your Achievement and Additional Tips

Congratulations! You’ve successfully built your very own wood shed. Take pride in your accomplishment and enjoy the additional storage space, workshop haven, or backyard retreat you’ve created. Here are some additional tips for ongoing success:
- Regular maintenance: Inspect your shed regularly for signs of wear and tear, such as loose nails, damaged siding, or roof leaks. Address any issues promptly to maintain the shed’s structural integrity and longevity.
- Weatherproofing: Consider applying a water repellent treatment to the exterior walls periodically, especially in areas with high humidity or frequent rain.
- Security: Install a secure lock on the door and consider adding motion-sensor lights for added security.
By following these tips and utilizing detailed wood shed plans, you’ve armed yourself with the knowledge and the guts to tackle your very own wood shed. Remember, the process is meant to be enjoyable and rewarding.
Embrace the journey, take your time, and don’t be afraid to ask for help along the way. Before you know it, you’ll be kicking back in your own custom- built slice of backyard heaven.
